Made from scratch, just for fun.
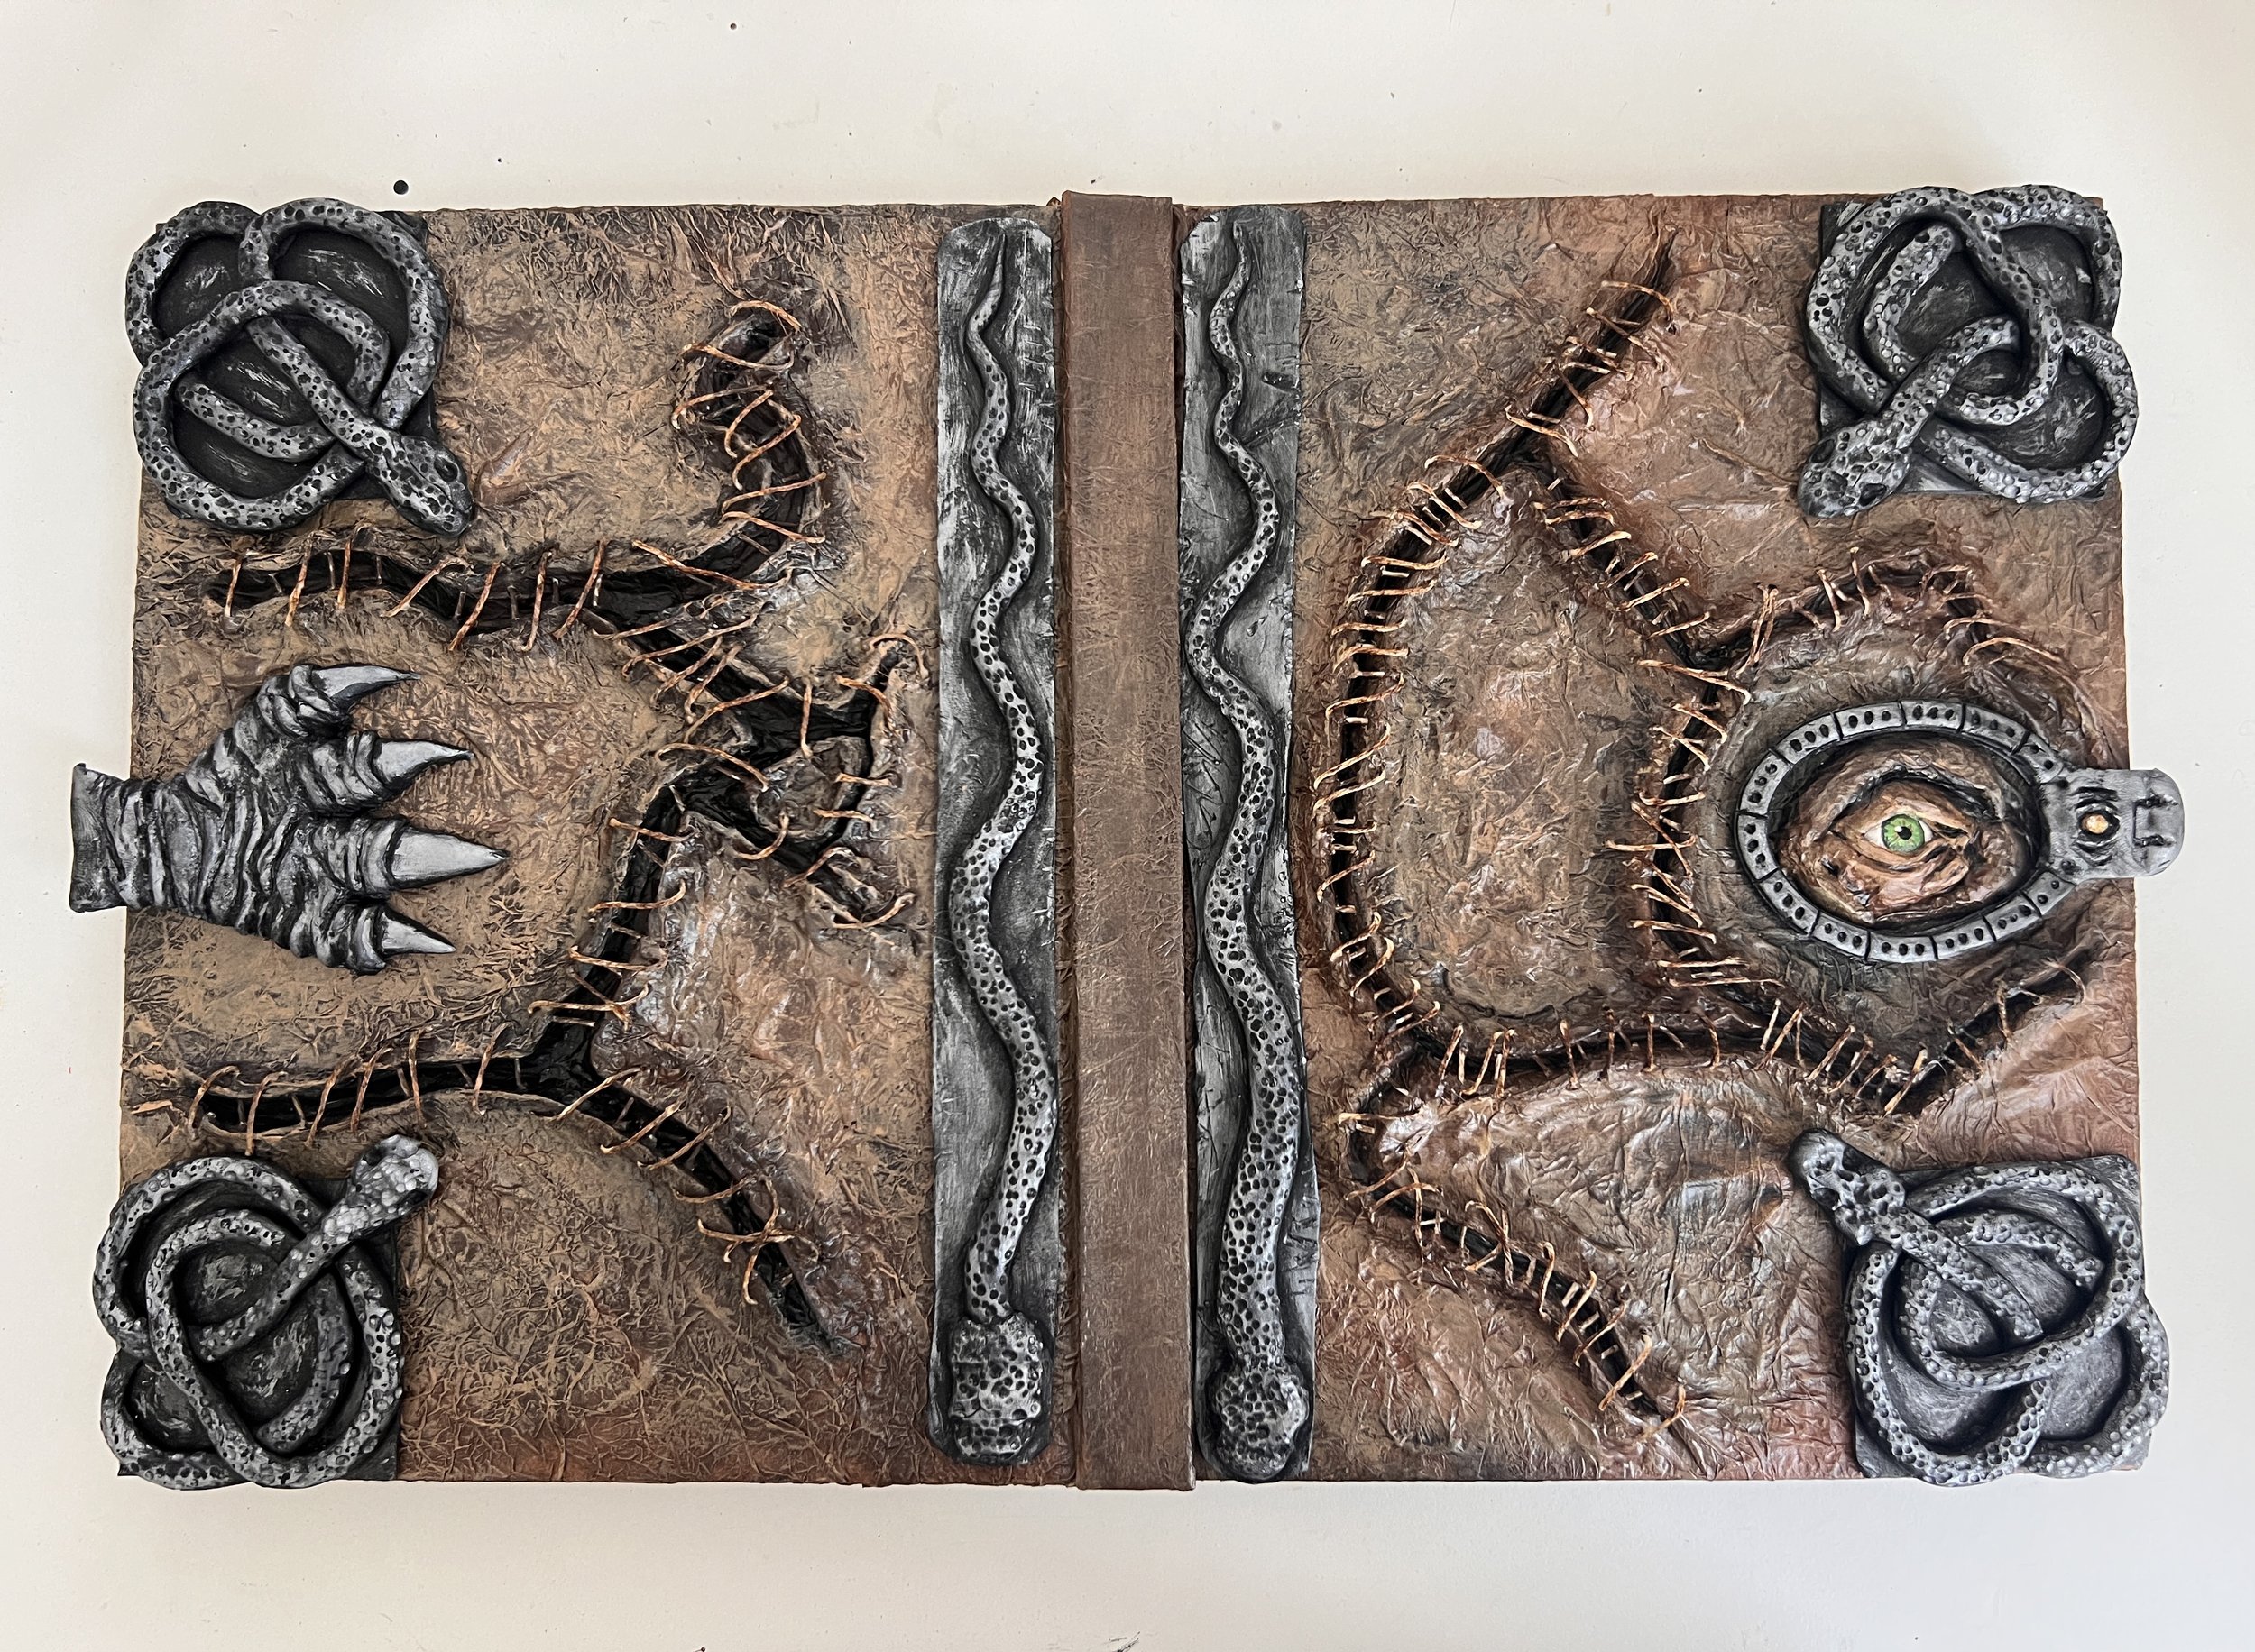
I have always been a creative thinker, never shying away from an artistic challenge no matter how little experience I have working with a certain technique. So when my friends surreptitiously picked the Sanderson Sisters to be our Halloween costume of the year, I immediately resolved myself to making the iconic book from the movie Hocus Pocus.
I obtained the basic tools and supplies needed, gathered countless amounts of reference photos, and began my project. This was my first experience sewing and working with clay, so I truly had to trust my artistic abilities and throw myself into this project full-force.
Creating a life-like otherworldly prop was something I obtained immense joy from. I gained new artistic skills from this project, and was reminded that something as seemingly silly as recreating a movie prop from my childhood can turn into a project that reminds me why I love being an artist.
Please enjoy these process photos, and thank you for joining me on this artistic journey.

I began with purchasing a basic sketchbook with 8.5 x 11 paper measurements. I sketched a roadmap for placing the clay pieces on later and where I wanted the stitching lines to be. I wanted to create a solid foundation that I could stick to as the project progressed.

I then worked on weathering the outer edges of the pages to help the book appear hundreds of years old, as referred to in the movie. This was done by slightly ripping and sanding down the pages then using a mixture of watercolor, tea stain, and stamp pads to add color.
Next came working with the clay. As mentioned before, this was my first experience shaping and drying clay so I had limited tools on hand. For me, this was a wonderful reminder that my ability is far more important than having the most advanced or expensive tools - I simply used a palette knife, a dull pencil, a spoon edge, and my hands to shape the clay.
After the clay was dry I did a quick wash with black acrylic paint, wiping down with a damp paper towel to give it a distressed and old metallic look.


The most challenging part of this project was figuring out how to prep the clay to ensure the threading would go smoothly. I decided to create “valleys” on the book with air dry clay, reinforcing it with wood glue. I then punched holes where the thread would eventually go before allowing the clay to dry overnight.

After the clay was dry I went in and applied multiple layers of tissue paper and mod podge, not taking extra care to be neat about it because I wanted an old and weathered look. Once the mod podge was fully dry I applied acrylic paint using a combination of browns and blacks. I then went in and hand-painted the eye.


Finally, I took a basic needle and sewed through the premade holes with waxed thread. I used hot glue to repair any mishaps and sealed down the ends of the thread. I then went back and distressed the thread to darken it and glued on the remaining clay pieces.
